Guide: Why You Can't Pike and Pancake!
From simply being able to touch your toes to mastering the pike and the pancake, great hamstring flexibility is the goal of many trainees but most don’t make progress or end up injured.
This guide will take you through the steps needed to make progress in these positions. I’ll also share a link at the bottom that will take you through these steps in a handy YouTube video if you prefer to learn and follow-on that way.
STEP 1: THE PIKE AND PANCAKE BASICS
To address the pike and pancake positions, I first need to touch on the topic of hamstring flexibility, and the potential reasons why you aren't making the best of gains in that range of motion.
Let’s start by going through some common mistakes.

Use stretches that work!
STEP 2: COMMON MISTAKES
Before getting into some targeted stretches, I want to delve into the function of the hamstring.
The hamstring is primarily used to extend the hips, so think about lifting your leg out straight behind you. However, it's also used to flex the knee (think about picking your foot off the ground behind you), and finally to posteriorly tilt the pelvis (among other things). This posterior tilting is the function that we are most interested in here.
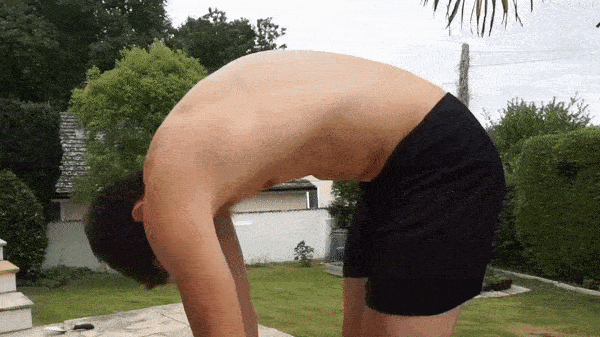
When it comes to stretching the hamstring, I often see people trying to stretch the hamstrings at the end of a session. They bend over, straining to touch their toes and all you see is this neutral pelvis and a massive curve in the spine!
This same pattern is common in those that train the pancake. They'll load up some weight on their backs and get into a loaded pancake position on the floor. All they achieve is flexing their spine...
A key to developing the pike and pancake is to avoid excessive flexion in the lower back.
STEP 3: KEEP YOUR SPINE IN-LINE
So the key question is this: how do we make sure we have a neutral spine in the pike and pancake?
The first thing that you can do would be to make sure that you are stretching with a neutral spine. By focusing on keeping that spine neutral, you're going to focus the movement on the hitch which is where we want it to happen.
We can stretch the hamstring later on when you get a little bit more mobile and possibly start introducing something like the Jefferson Curl (which is a flexed back position) but for the moment for the sake of this simplicity, make sure to focus on having a neutral spine when executing the following stretches. Next, let’s look at some stretches that build a range of motion that is transferable to the pike and pancake.
Learn what a neutral spine feels like!
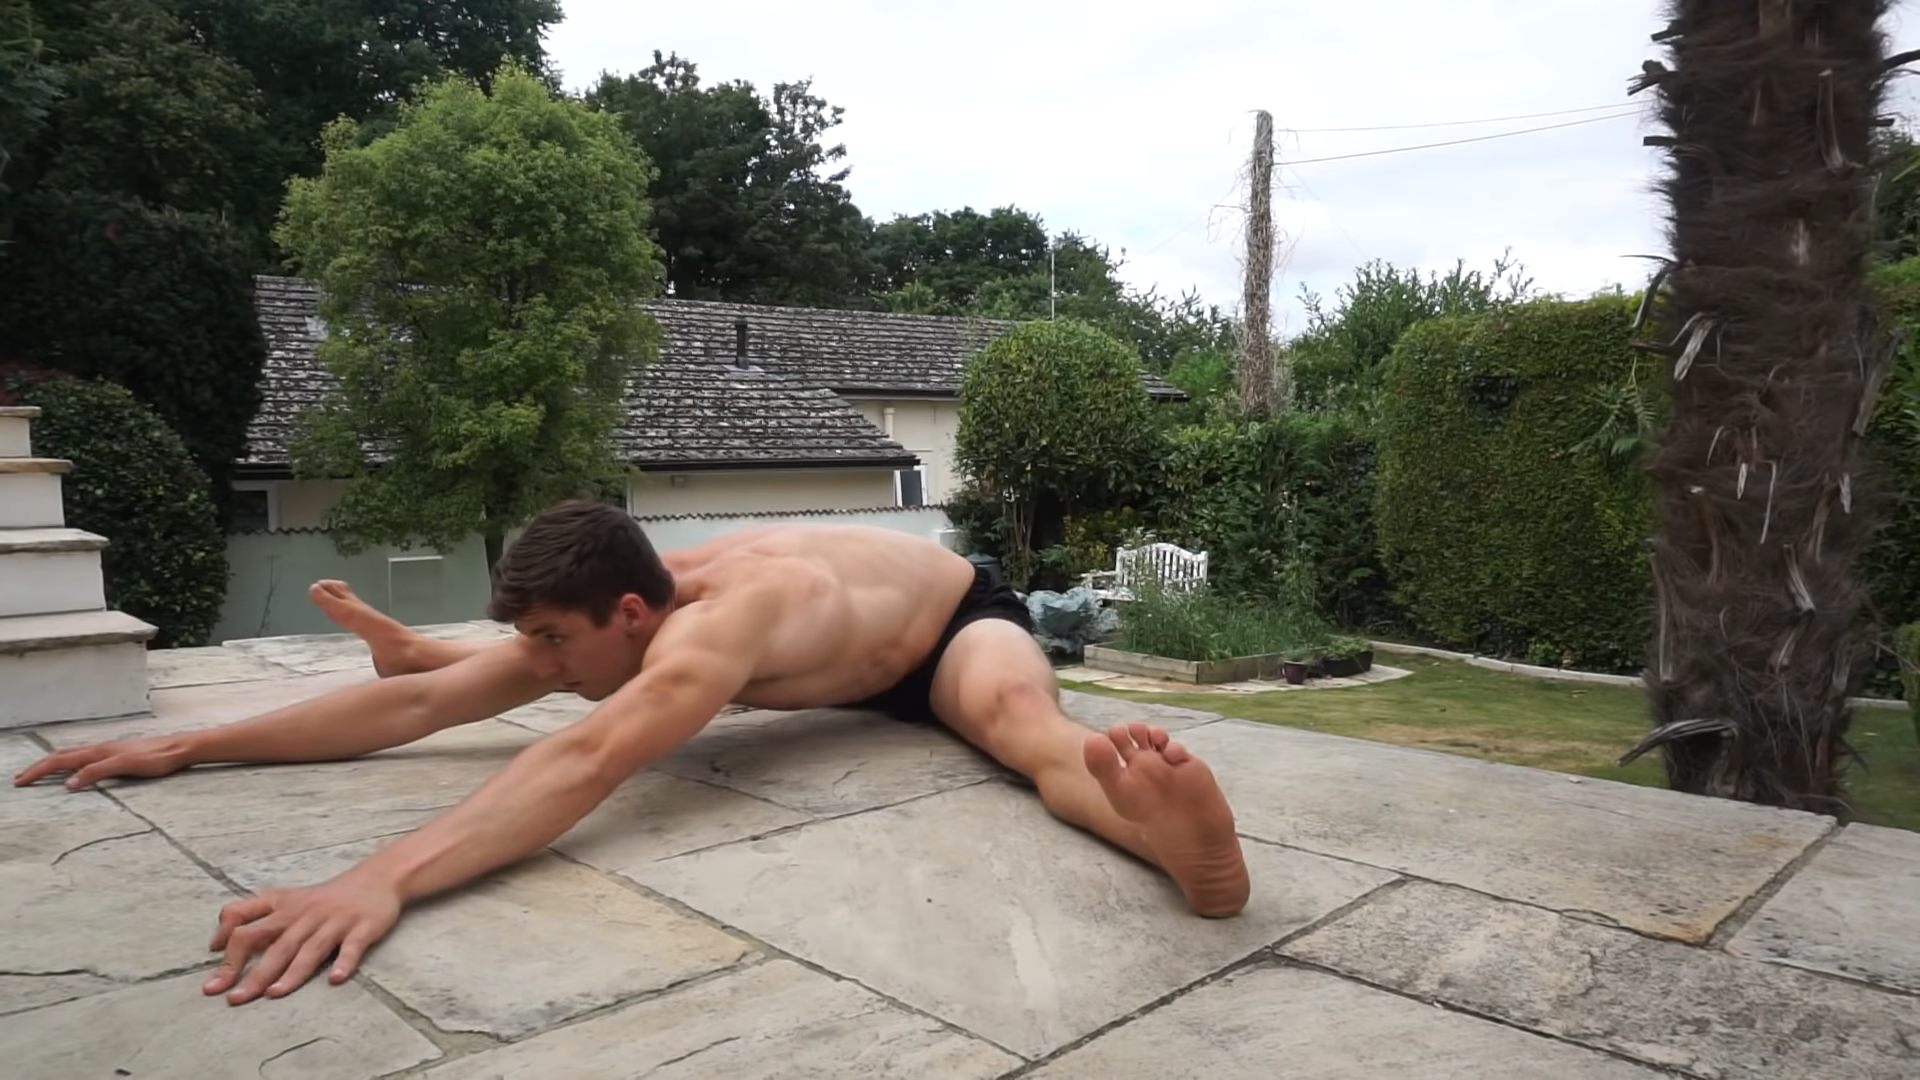
STRETCH 1: ASSISTED GOOD MORNING (ONE LEG)
The assisted single-leg good morning is a really easy accessible exercise for pretty much anyone.
In this stretch, you're going to have your feet in a staggered front-split stance (see the GIF to the right). Keep that front leg straight, with maybe a tiny bit of flex in the knee. Your other leg will be slightly bent and you're simply going to keep that neutral spine and hinge forward from the hips as far as you can go.
Ideally, you want to do this in front of a mirror or a window so you can see your body position and you can see when your hips stop turning and your back starts to take over.
For those who have struggled to get a good hamstring stretch in the past, you're really gonna feel this in that hamstring. A nice thing about this exercise is very progressive - you can move ten degrees at the top and probably feel a stretch on the hamstrings.
I recommend advancing and working towards a 90˚ angle at the hip (between the lower back and the leg) before incorporating flexed spine stretches for the hamstrings.
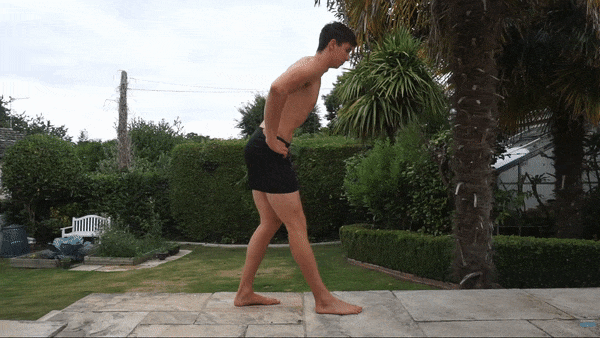
The one leg assisted good morning.
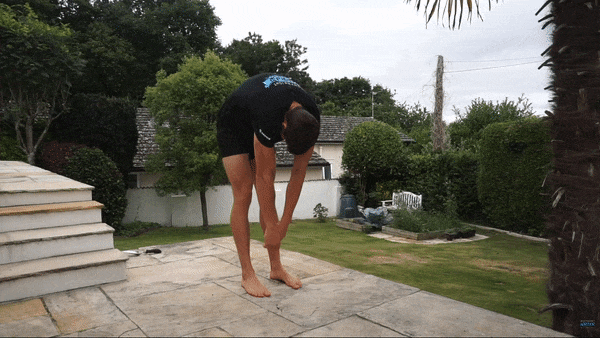
STRETCH 2: STANDING STRADDLE GOOD MORNING
The same principles carry across to the next stretch; the standing straddle good morning. In this stretch, keep a neutral spine and make sure that all of your flexion is coming from the hips. As soon as you start to flex the spine - that is your max range of motion you're gonna stop.
For both of these exercises you could perform them for about 10 slow reps, and then try to pause for 10 seconds on that last rep in the max range of motion. Get comfortable!
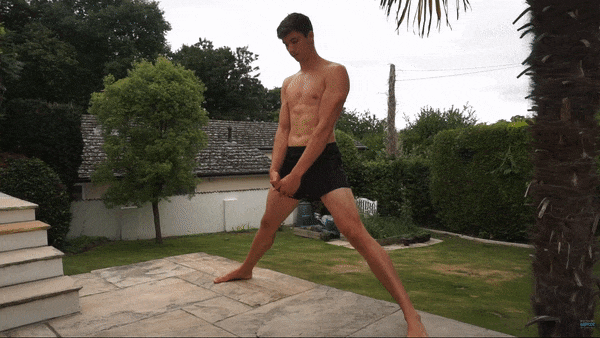
The standing straddle good morning.
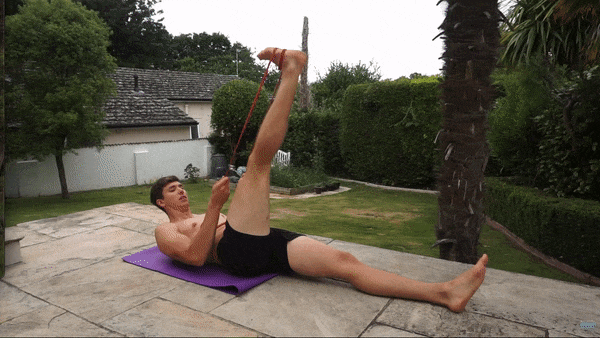
STRETCH 3: BAND-ASSISTED STRETCH
The last exercise to work through a band-assisted stretch is inspired by Yuri Marmerstein. This is a stretch where you will be using the floor to assist you. It will make sure that your spine stays neutral and that the movement is coming from the hips.
For this movement, you are going to lie on your back and loop a resistance band around the leg that you're stretching, with your other leg just lying flat on the floor. Grab the resistance band and then pull your leg into its end range of motion. Lying on the floor is useful here because it basically keeps your back in that neutral position. It keeps you honest!
Next, you can simply hold that position if you want to or you can perform some reps. To do this, bend the knee to drop a little bit deeper into that range of motion and then extend the knee again. You can use some PNF contractions against the resistance of the band (try and push your foot away against the band) resisting for 10 seconds and then relaxing.
For a progression on this stretch, you can drop your leg out to the side and perform the same stretch but in a position that will be more targeted towards the pancake position.
Depending on what type of exercise you're doing, you can either hold it for 30 to 60 seconds, or you can perform around 10 reps - and then a 10-second hold on the last rep - experiment to see what feels good.
SUMMARY
That is basically it guys! If you're struggling to gain range of motion in your hamstrings or your pancake then routinely applying these exercises (with the variations that I discussed) should help you make some solid progress.
Make sure to keep focusing on the form cues (keeping that neutral spine or using the floor) and work up to practising the movements three times a week for a few sets in each position. This frequency (also known as greasing the groove) will help you break through some flexibility plateaus; especially if you're new to this!
If you have any questions just leave a comment down below and I'll do my best to reply. Alternatively, you can join my Facebook group and ask the community.
Have a strong and supple week and let me know how you get on :)
FOLLOW ALONG ON YOUTUBE?
Alternatively, scan this QR code if you are heading off to the gym and want to watch along on your phone as you train.
Still Lost? Join the Trybe.
If you’re still struggling to find a plan, why not try my app Trybe? There are 8 different handstand levels to work through beginner to intermediate alongside a variety of others working on strength, skills and flexibility.